What is a Blower Door Test?
/A Blower Door is a test that measures the amount of air leakage/infiltration in a building. The fan creates a vacuum, depressurizing the building, and the result is measured by a pressure gauge. The numbers generated by the test allow us to quantify the amount of air that is infiltrating the building from the outside.
Typically a Blower Door Test takes 30 minutes to perform. Before setting up the Blower Door fan and performing the test we do a walkthrough of the residence. There are several things we are looking for in this walkthrough.
All exterior doors hung, hardware installed, and weatherstripped.
Electrical outlets and covers are installed.
Attic hatch is installed to fit & weatherstripped
HVAC system is installed and turned off for test.
HVAC boots are caulked and registers installed.
Molding on windows and doors installed.
Baseboards caulked.
Electricity is turned on at residence.

Attic Hatch INstalled Properly
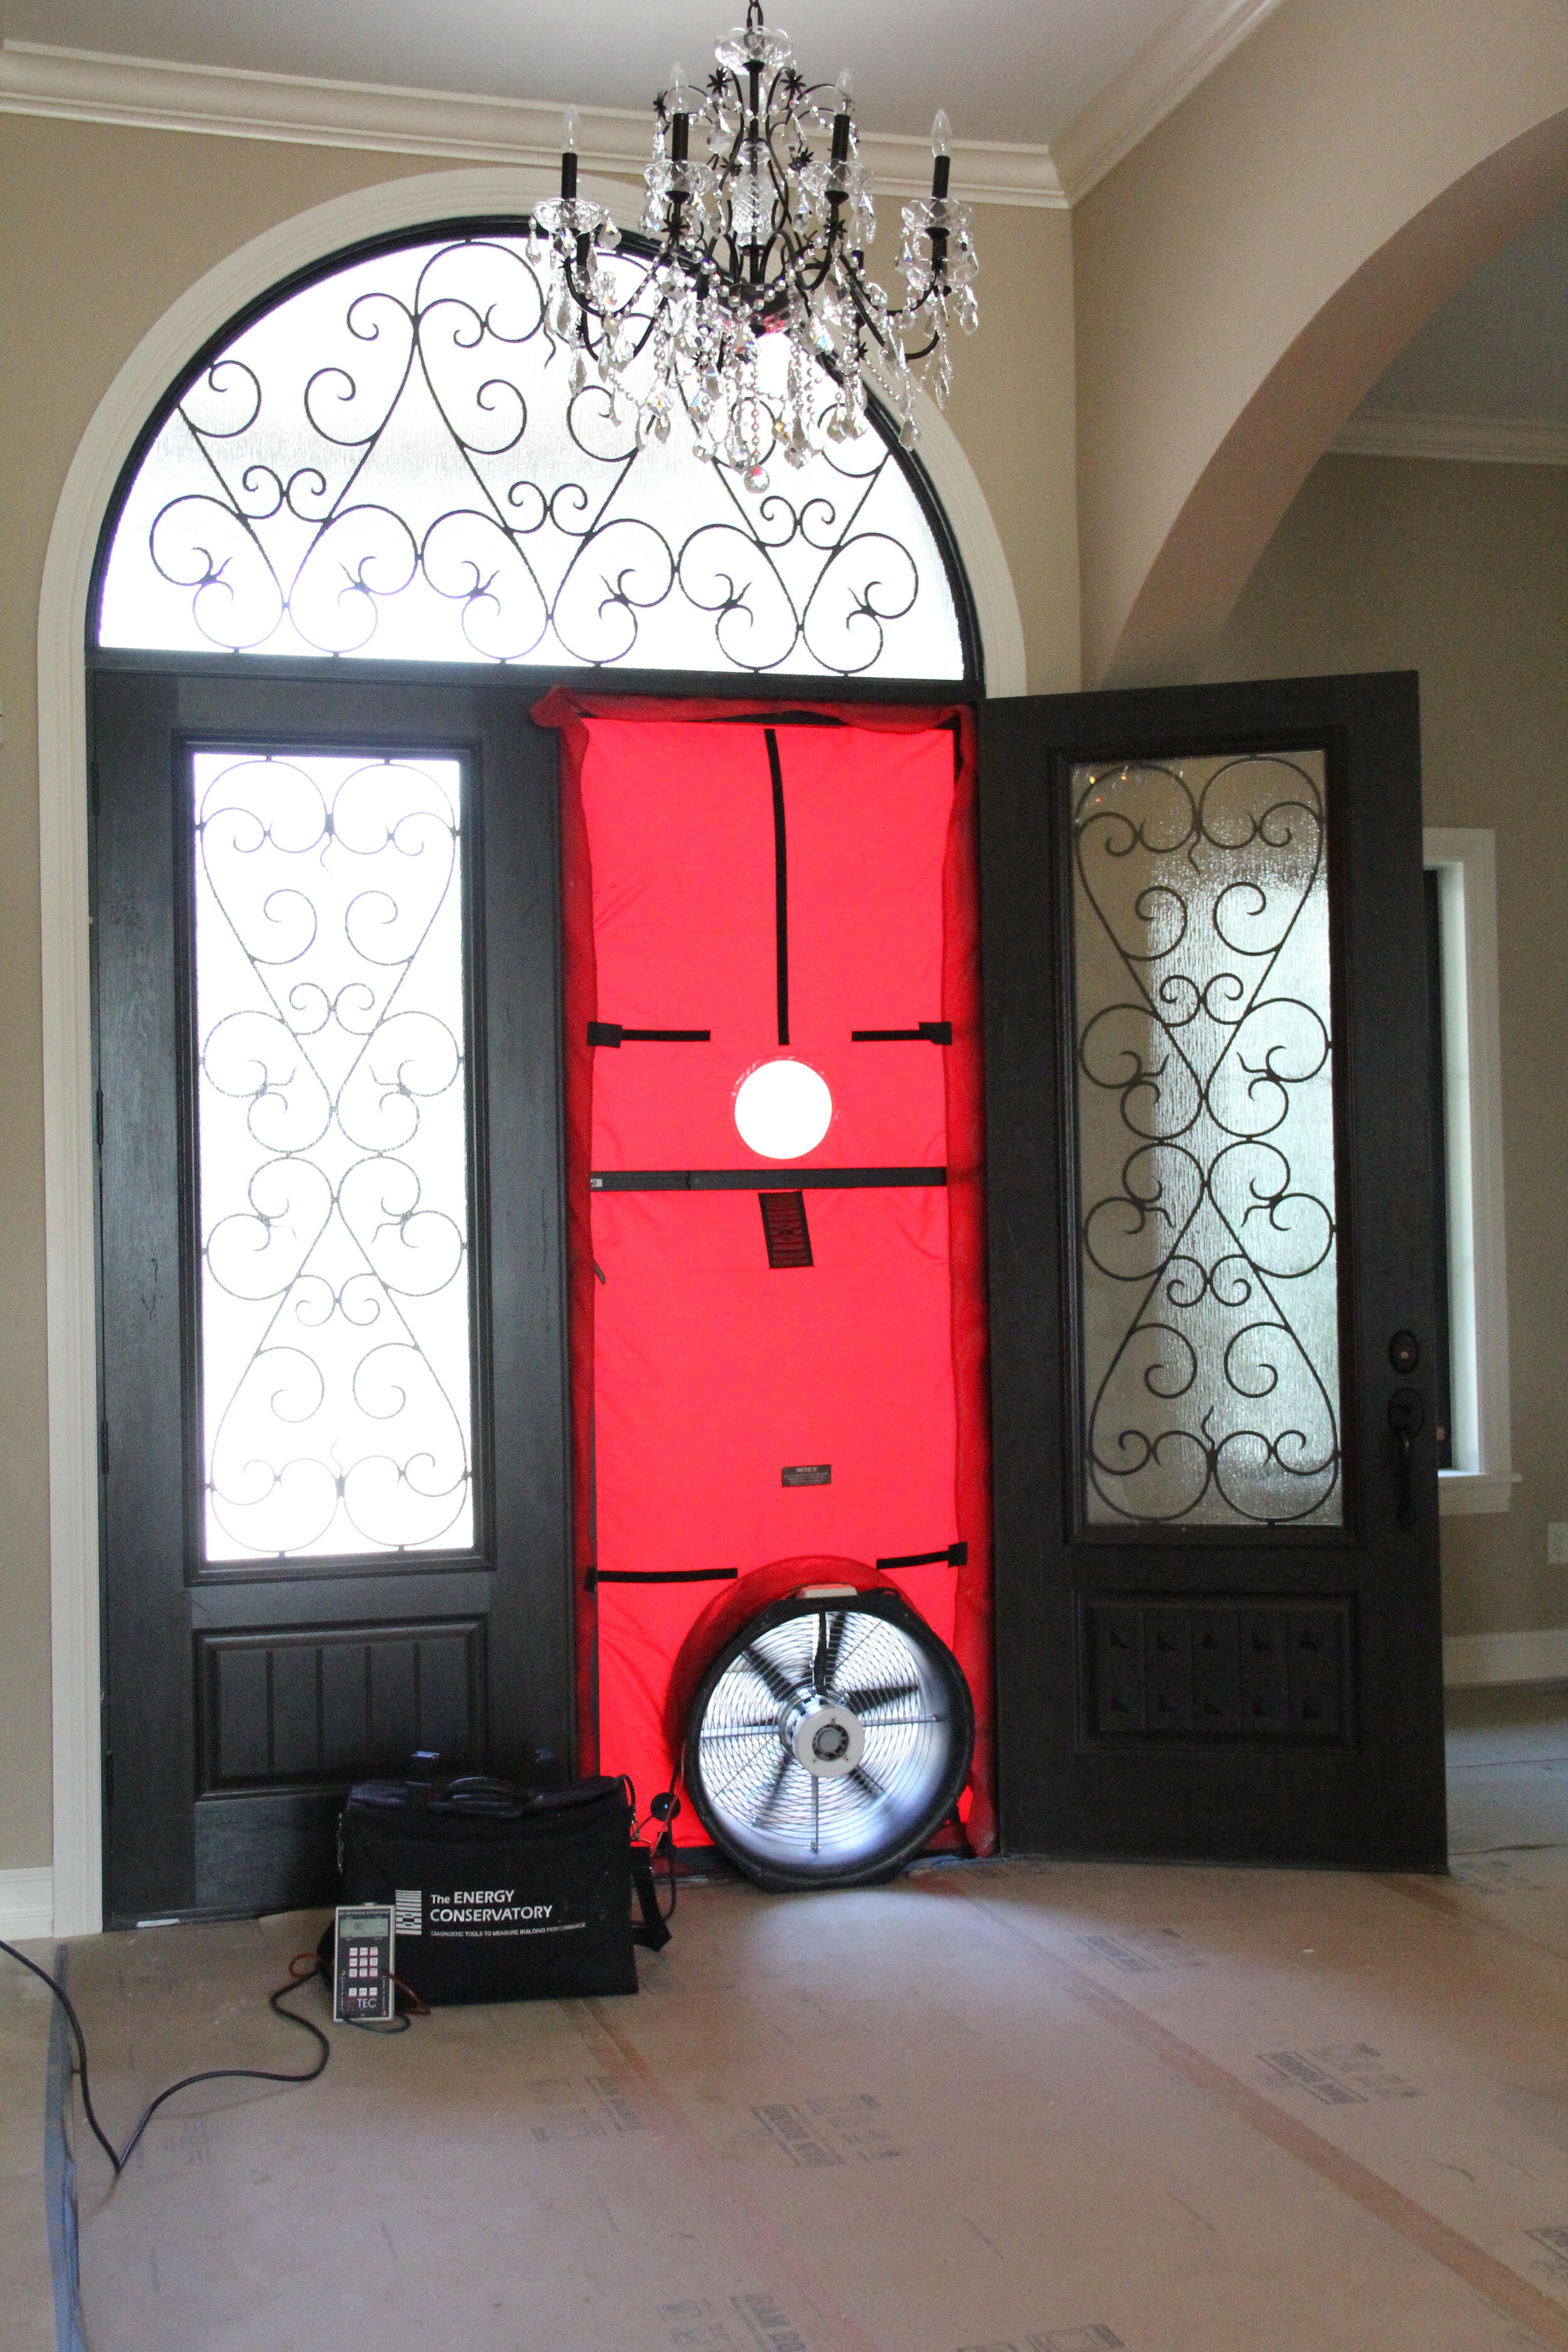
When the walkthrough is complete and all above items are to satisfactory, the Blower Door can be set up. The Blower Door equipment consists of a large fan, expandable door frame, red tarp to fit to door frame, red and green pressure hoses, digital manometer, and power cord.
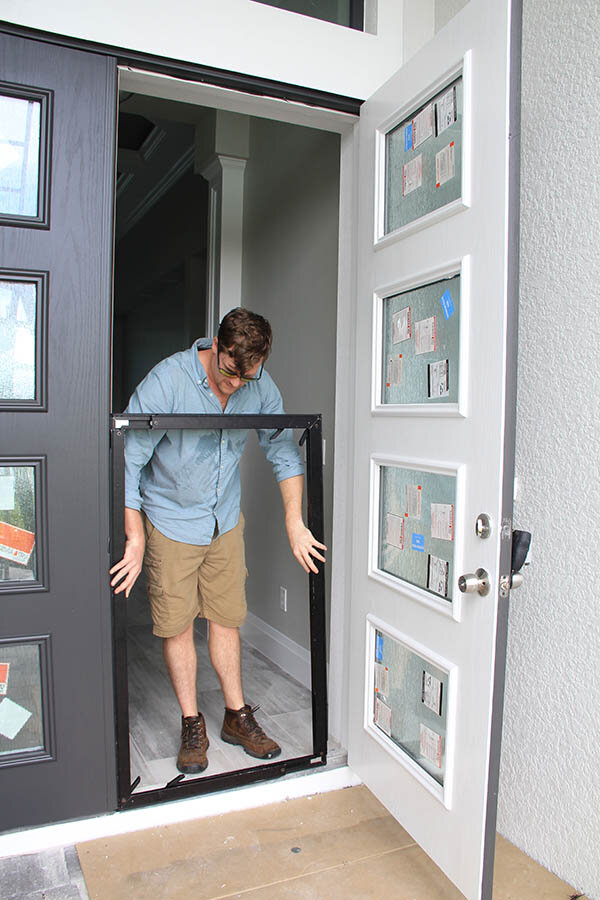
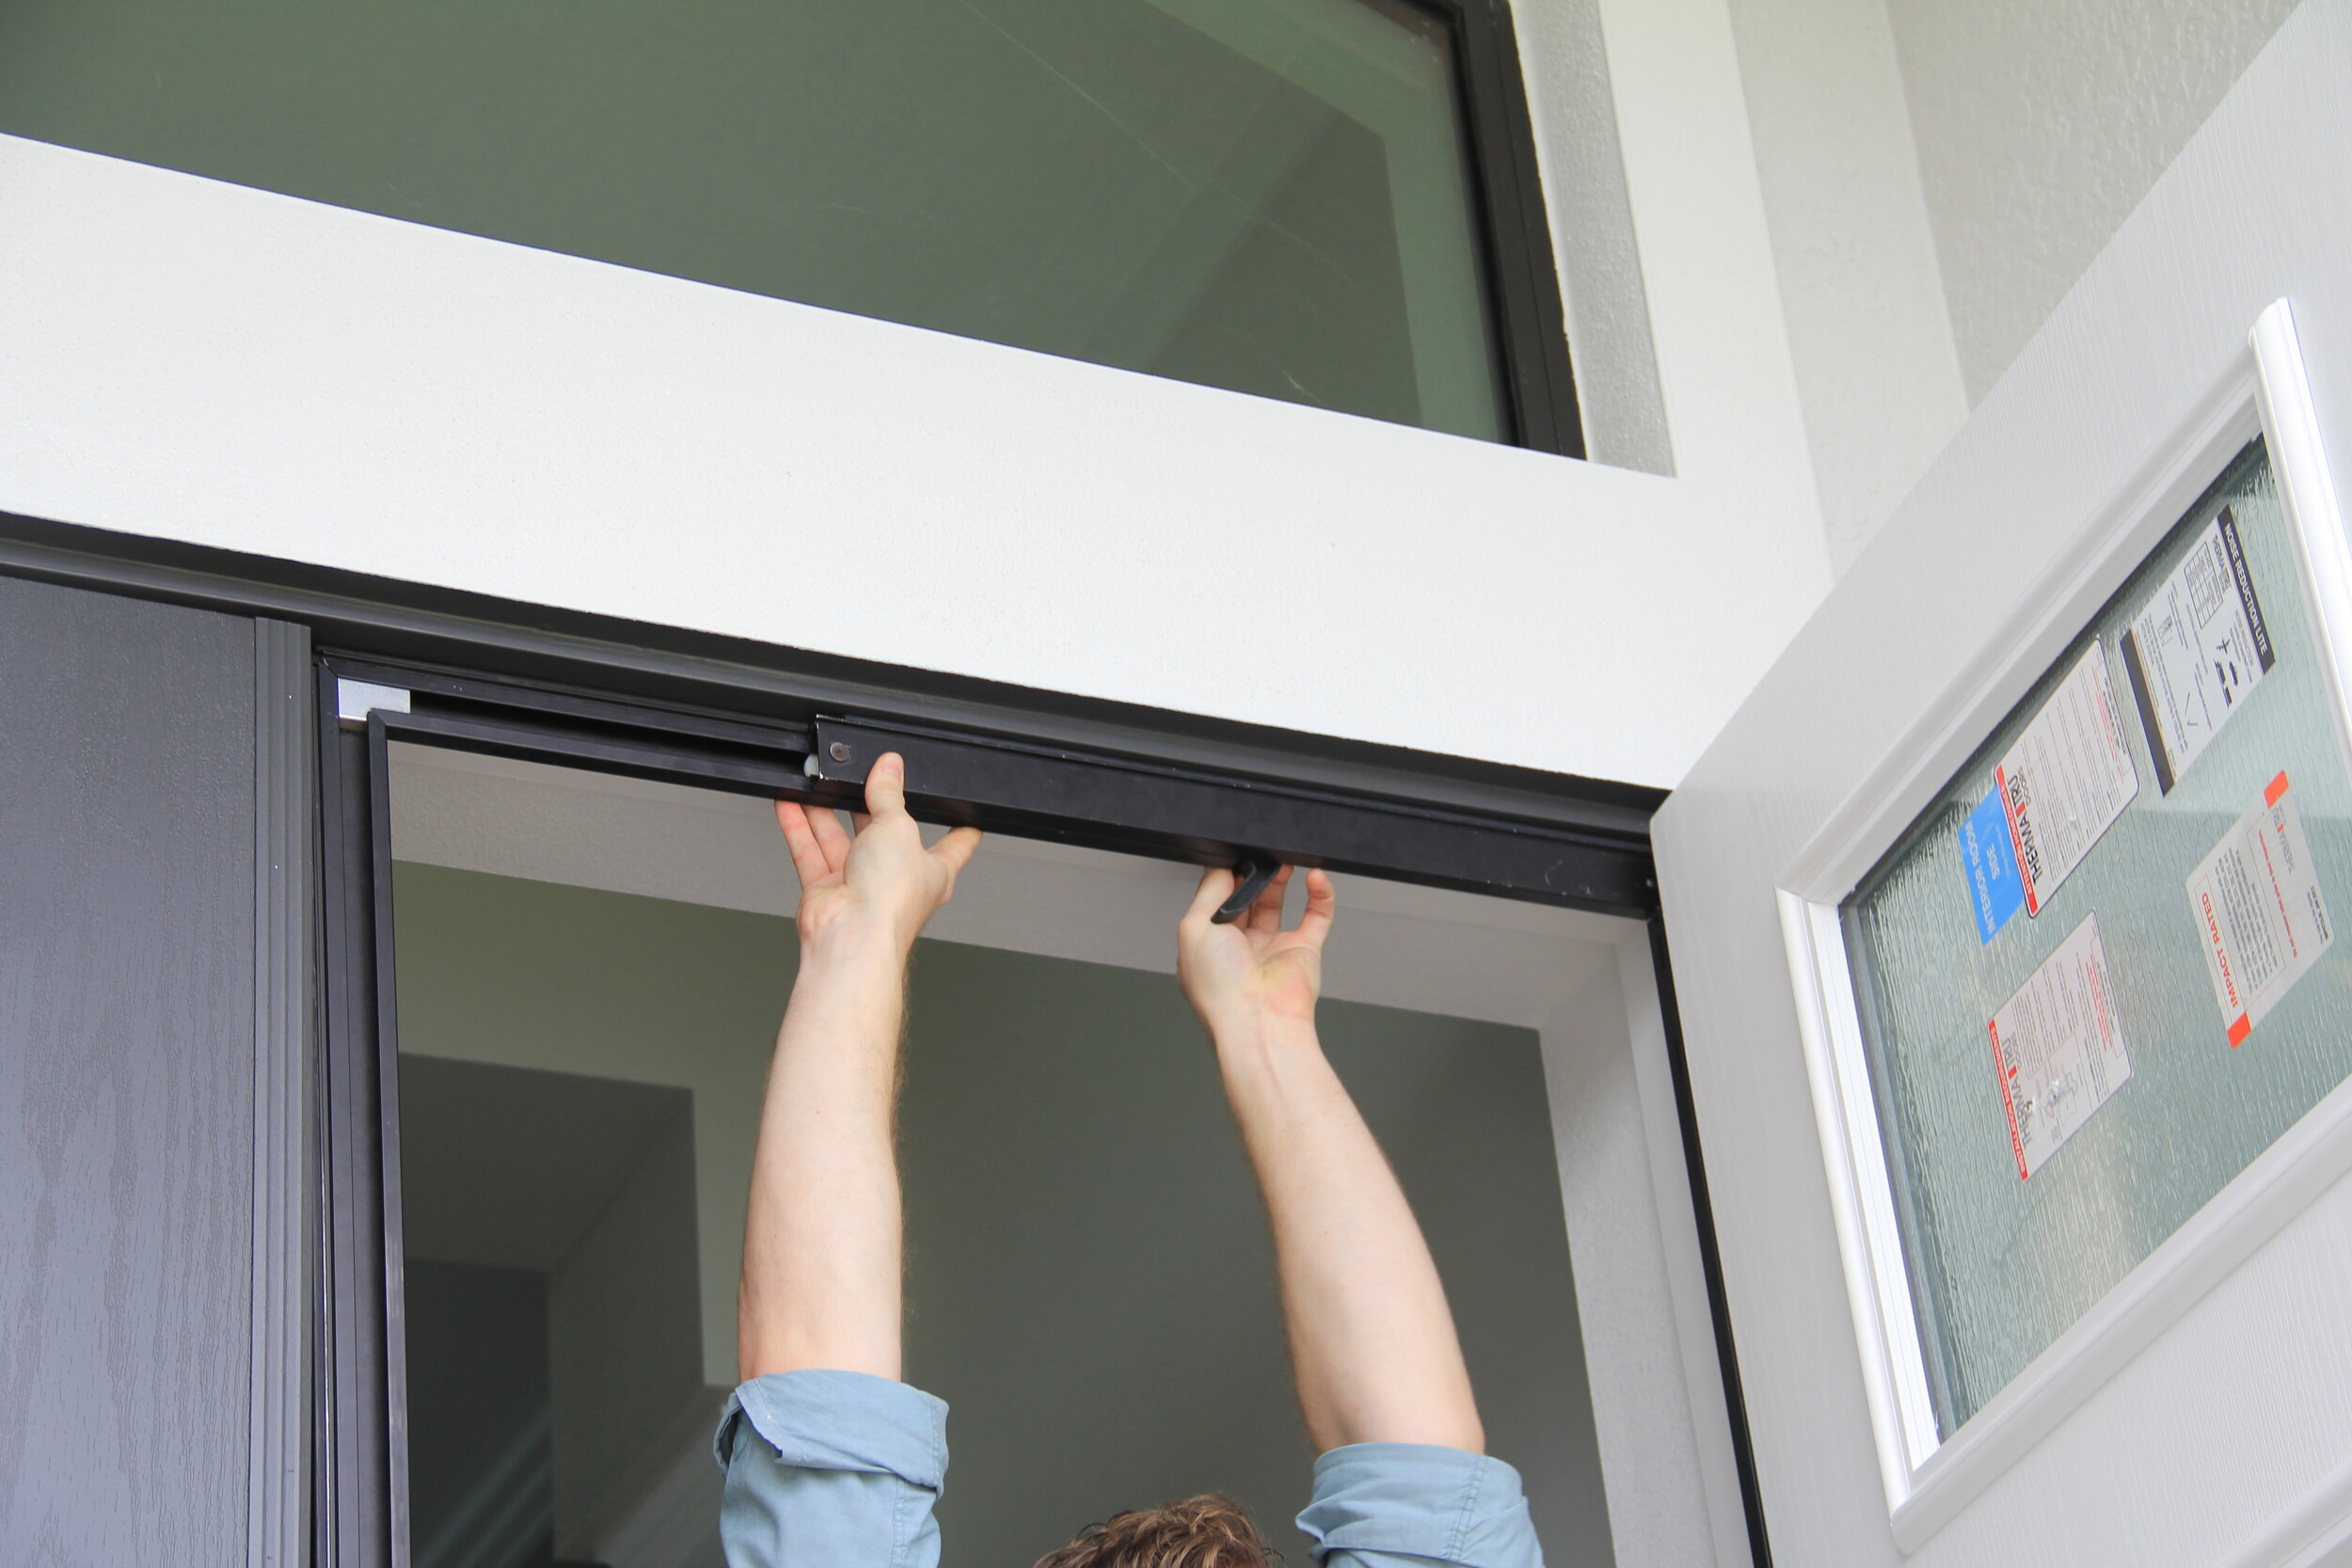
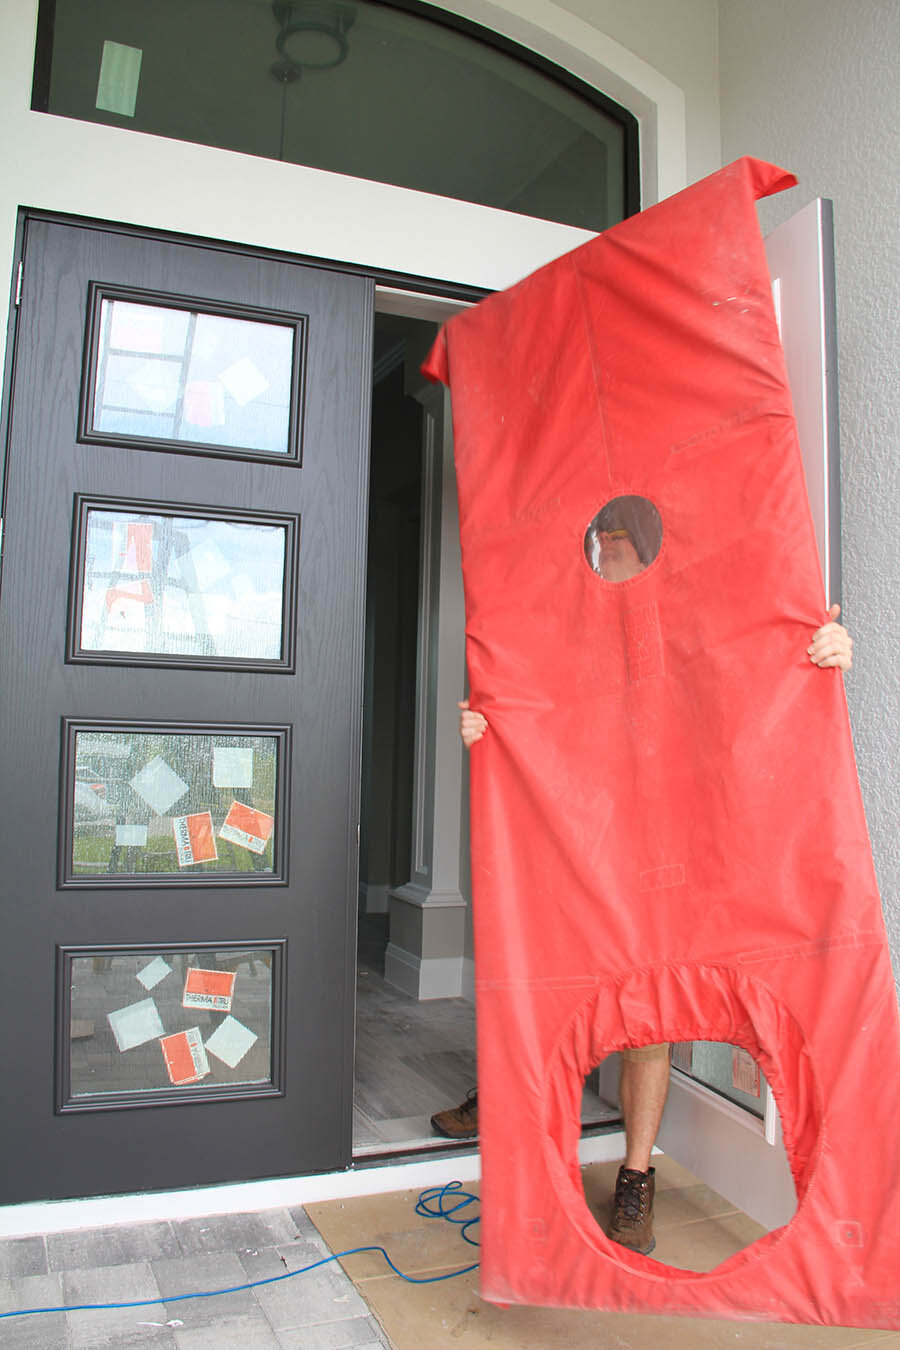
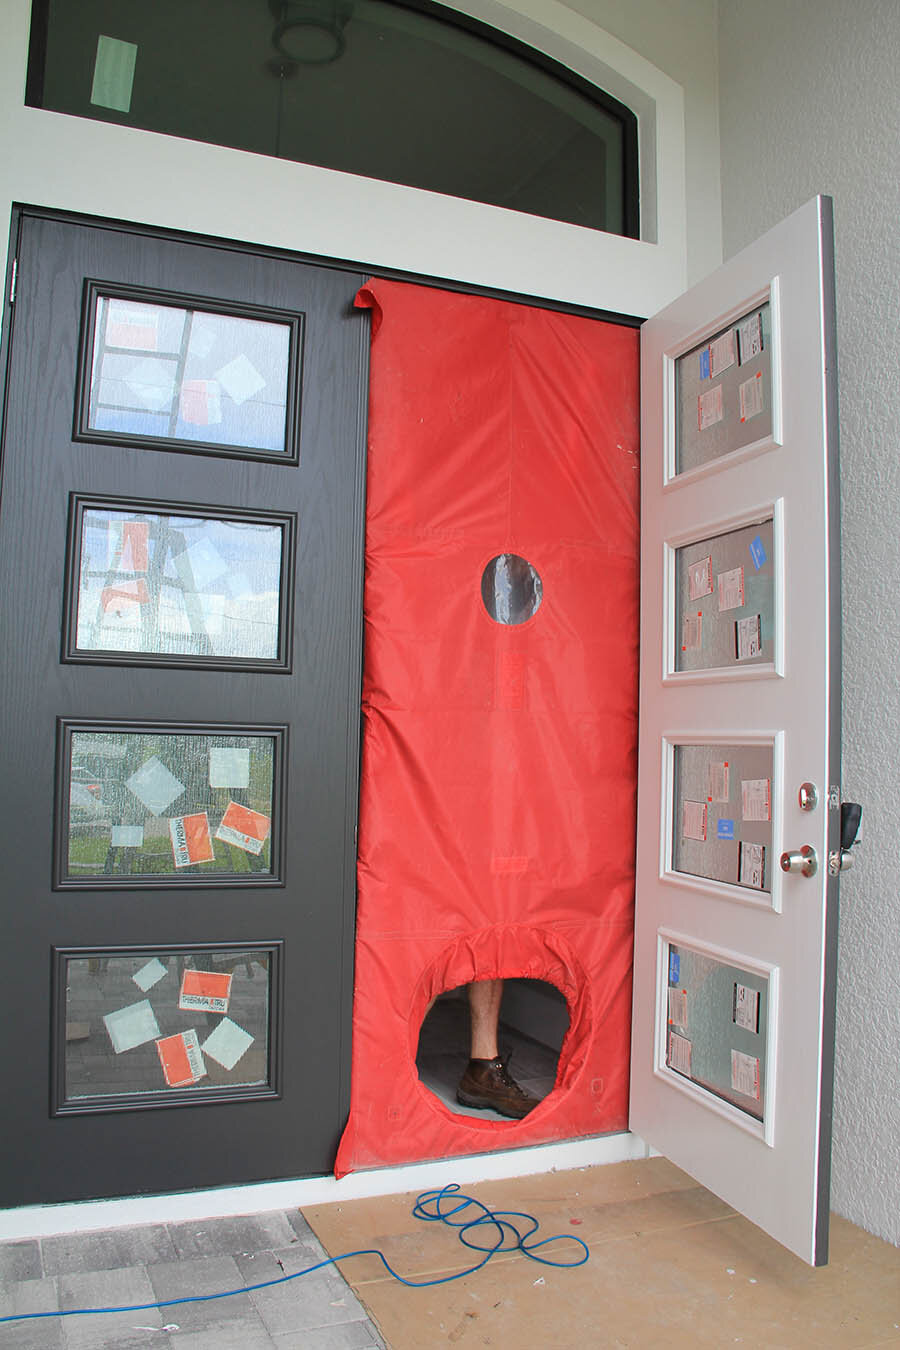
The above photos show expanding the door frame to fit the exterior door. Note: if door the front door is too large for frame, a garage door or other exterior door can be used to perform test. Once the frame is fitted, the tarp can be wrapped around frame for an airtight seal.
The Green Pressure Hose is run outside to the left or right of the door as far away from the fan draft as possible. The other end of the hose is run through a sealed hole in the tarp to be hooked up to the Digital Manometer. Note: This hose measures the outside air pressure.

Interior view of Blower Door set up.
Next the fan is set in place. There is a hole in the tarp with an elastic band to ensure a proper airtight seal between tarp and fan.
One end of the Red Pressure Hose, which measures the Fan Pressure, is connected to the fan. The other end of the hose is connected to the Digital Manometer. Now all that is needed is to connect the fan to a power source.
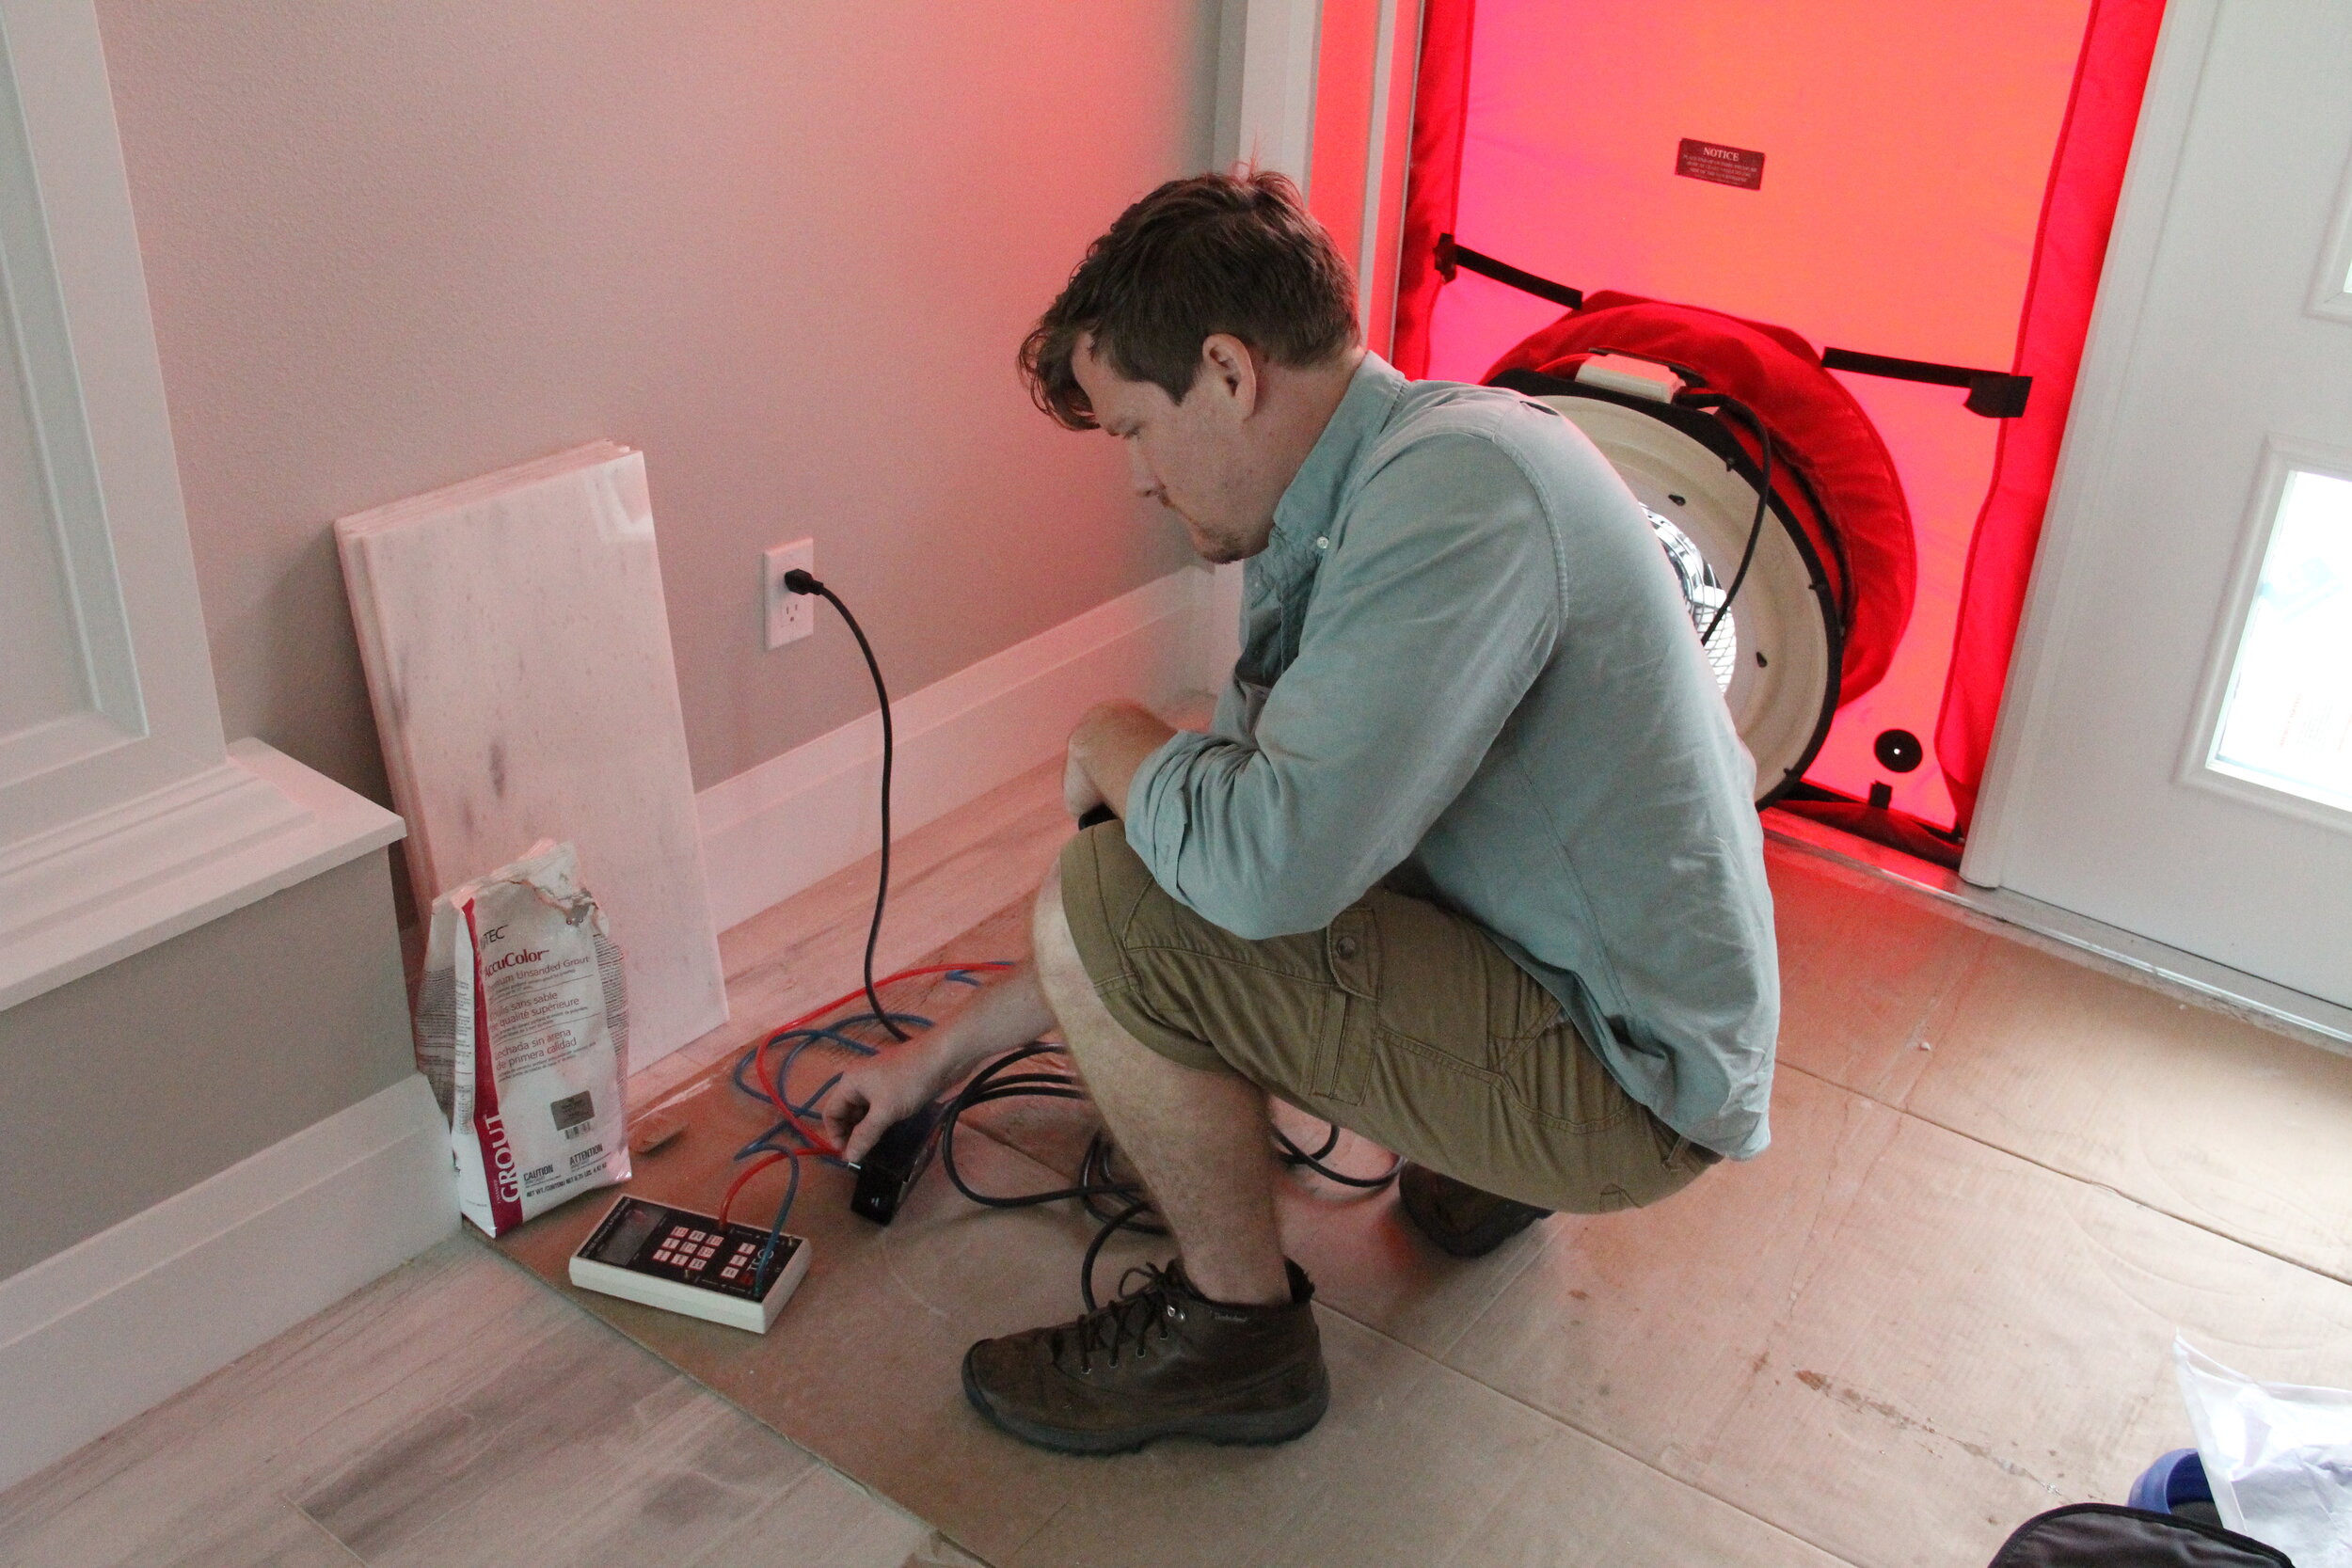
The Blower Door is set up and ready for testing. Now we don’t want to lose you with complex equations and conversions. Just know that the Digital Manometer is calibrated for accuracy in these tests.. Both Red and Green Pressure hoses are hooked up to the Manometer. They communicate the outdoor pressure and fan pressure.
The Manometer has several settings to allow for adjustments in building space and equipment preferences. Fan ring size and CFM settings are the ones we most commonly use.
The fan is speed is brought up to 50pa and the CFM is the number generated is the air leakage measured. see below.

Digital Manometer with Green and Red Hoses connected.
The number on the left is the fan speed(50pa) the number on the right(CFM) is the one we use for our calculations. CFM is Cubic Feet per Minute. The amount of air leakage per minute of depressurization of the residence. This number is used to calculate the ACH(air changes per hour.)
See next blog to learn more.